
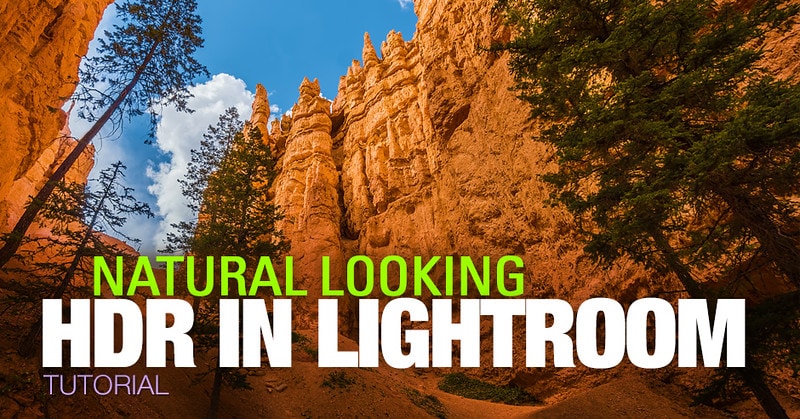
Streamlined HDR in Lightroom Workflow
I’m a giant proponent of HDR pictures and use it every day. I make use of completely different HDR software program and numerous modifying strategies to attain pure trying and balanced HDR images.
Through the years, the inspiration of my Pure Trying HDR method was the workflow the place I used a mixture of Photoshop and Lightroom. Utilizing Photoshop HDR Professional, the module of Photoshop, to merge a number of images to HDR and Lightroom to use a customized modifying approach to supply the ultimate look.
“Pure Trying HDR Pictures Information” is, by far, the most well-liked tutorial on PhotoTraces.com the place I break down my favourite approach.
I extremely advocate that you simply take a look at the “Pure Trying HDR Pictures Information” the place I additionally reply the commonest questions in easy phrases. A few of the questions embody: “What precisely is HDR Pictures?” and “Why do I would like HDR?”
The approach requires a number of steps and, if I show them schematically, it seems to be like this:
Lightroom > Photoshop HDR Professional > Lightroom > Photoshop
Typically, the approach is just not too advanced however it requires each Lightroom and Photoshop, in addition to a number of steps to finish it.
HDR in Lightroom? Is that this for actual?
Just lately Adobe launched a brand new model of Lightroom, model 6 (learn my assessment Adobe Lightroom 6 Evaluate – New Options). One of many largest addition that shocked many photographers was the Picture Merge HDR module built-in into Lightroom.
It grew to become the sport changer within the discipline of HDR pictures. Not solely does the brand new processing technique bypasses Photoshop altogether, however it additionally saves an infinite period of time on creating and modifying HDR images.
The HDR in Lightroom is the fact now.
Initially, I used to be planning to replace my “Pure Trying HDR Pictures Information” with the brand new Lightroom 6 HDR possibility however, later I noticed that Lightroom HDR is one thing utterly completely different that deserves its personal tutorial.
To proceed with this tutorial, all you want is Lightroom 6 or later. If you wish to observe me step-by-step, you will get the identical images that I used on this demonstration.
Obtain the supply RAW recordsdata beneath. Import them into Lightroom and you’re able to create your first HDR in Lightroom.
For Lightroom HDR tutorial, I chosen 3 bracketed photographs (-2; 0; +2) I took in Hawaii (O’ahu Island) whereas climbing alongside Hanauma Bay Rim Path early within the morning. I used Sony A6000 digital camera and Sony 10-18mm lens on a tripod (FEISOL Match CT-3442).
That was my very first journey with the brand new tools after I switched from Canon DSLR to Sony Mirrorless.

Earlier than you can begin with the tutorial that you must import demo photos to Lightroom.
Step 1 – Picture Merge > HDR
In Lightroom, choose 3 bracketed photos you plan to course of as HDR, proper click on (possibility click on) and choose PHOTO MERGE > HDR…

You can be introduced with the Lightroom’s new Picture Merge interface with HDR Choices.
As you possibly can see the variety of HDR choices are very restricted in comparison with standalone HDR packages like Photomatix. On the identical time, I discover them (choices) to be very efficient and I by no means skilled the necessity for extra controls.

Auto Align – regardless that I used a tripod, I chosen this feature in case the sturdy wind brought on digital camera motion between the photographs.
Auto Tone – when chosen, the Lightroom tries to mechanically tone map picture by adjusting the publicity, recovering the shadows and the highlights. Since I’m planning to make use of my customized edits, I don’t care about this feature.
Deghost Quantity – I should not have transferring objects in my composition in addition to the waving grass attributable to sturdy wind. I chosen LOW settings to permit some “ghosting” within the foreground, to have the ability to obtain the impact of lengthy publicity softness.
When you’re finished with the HDR Choices press MERGE button and Lightroom goes merge 3 bracketed photographs, create new HDR picture with the DNG extension and put it aside subsequent to the unique photos. All finished mechanically.
Beneath is the brand new HDR picture produced by Lightroom. As you possibly can see it seems to be uninteresting and unappealing and we now have to use Lightroom edits to carry it to life.

Step 2 – Preset Primarily based Lightroom Modifying
To hurry up the method of modifying and to have extra inventive choices, I made a decision to make use of Lightroom Presets Primarily based Modifying. The approach is predicated on making use of beforehand saved presets to the picture and selecting the right trying model.
To observe alongside, that you must use my Free Lightroom Preset Assortment. Should you need assistance on tips on how to set up and use free presets, please examine my tutorial: The right way to Use PhotoTraces Free Lightroom Preset Assortment

Preset: Pure
First, with just one click on I utilized Pure preset from my Free Lightroom Preset Assortment and later used ToolKit changes to advantageous tune the picture (for assist examine the tutorial).
Listed here are the precise modifying steps I used to attain the ultimate look:
- Pure preset
- 08 Open Shadows ++
- 20 Vibrance +
- 23 Saturation 0
- 38 Sky Blue Darker +
Modifying system: Pure (8, 20, 23, 38)
Preset: Finish Of Summer season
Modifying system: Finish of Summer season (4, 12, 15, 32)
Preset: HDR Mix
Modifying system: HDR Mix (12, 21, 40)
Preset: Hawaii Sundown
Modifying system: Hawaii Sundown (4, 8, 31, 40)
The next “seems to be” I managed to attain through the use of my premium Landscapes Lightroom Preset Assortment Vol.1

Preset: Tropical Morning
Modifying system: Tropical Morning (32, 40)
Preset: Damaged Clouds
Modifying system: Damaged Clouds (8, 11, 15, 31)
Preset: Pinkish Hue
Modifying system: Pinkish Hue (32)
Preset: Level Lobos
Modifying system: Level Lobos (5, 9, 12, 15, 40)
Preset: Skyshine
Modifying system: Skyshine (1, 9, 33)
Step 3 – Artistic Choice
As you possibly can see, through the use of Lightroom Preset Primarily based Modifying we managed to create 9 very distinctive “seems to be” in a really quick time frame. Subsequent step is to pick out the model we like the most effective.
My private choice is the “look” produced by Tropical Morning preset.
What’s your favourite “look”?

Conclusion
The brand new Lightroom HDR module simplifies the method of making HDR images. It’s less expensive (no Photoshop required) and far easier. Together with the Lightroom Preset Modifying, the method of making HDR images turns into extra streamlined and fewer time-consuming.