
Final week, I returned from an thrilling images journey that was devoted to exploring Utah’s backcountry.
I spent 10 days driving filth roads deep contained in the deserts and mountains of Utah. I drove alongside some iconic filth roads like Bull Path, Gap within the Rock, and Cottonwood Highway, all of which have deep roots in Utah’s wealthy historical past.
To perform such a visit, I wanted two issues: a excessive clearance automobile and dry climate. A lot of the filth roads in Utah are composed of clay and are unpassable when they’re moist no matter what automobile you’re driving.
I initially supposed to take this journey final spring, however I needed to change all my off-road plans on the fly due to the wet climate that occurred within the third week of Could.
This time, all the things went based on plan. I secured a Jeep Wrangler for 10 days and the climate was good, scorching, and dry.
Loc: 38.402230, -111.208023
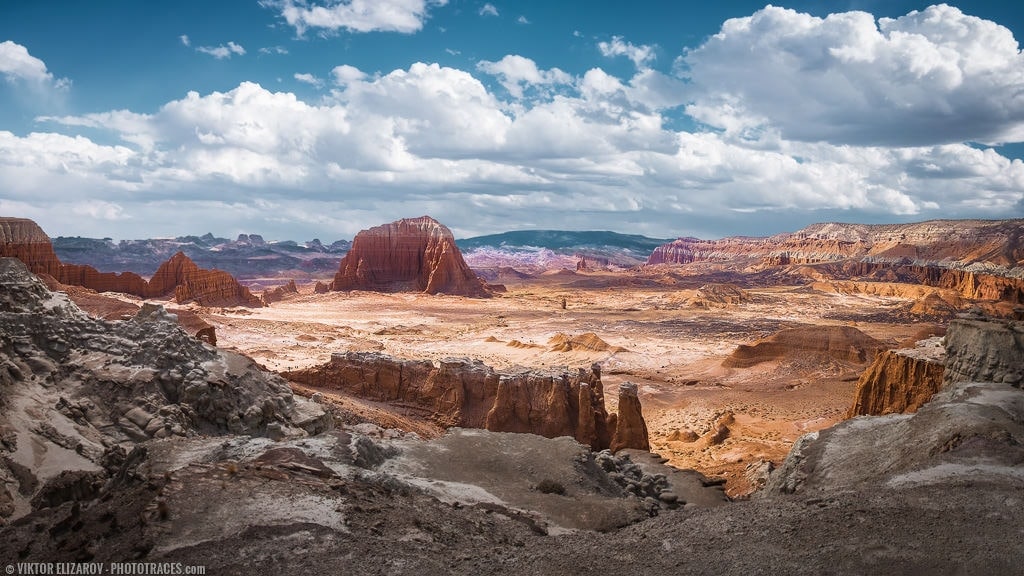
I took the featured picture throughout the spectacular however very tough and bumpy 100km Cathedral Valley Drive in Capitol Reef Nationwide Park.
I used to be on my approach to the Cathedral Valley Campground, which is a novel place by itself. It’s positioned at an altitude of two,400m and gives an unobstructed and open view of Cathedral Valley. The campground has solely 5 spots and works on a primary come first serve foundation. I wished to safe a spot for the evening as early as doable.
That is after I found the Decrease South Desert Overlook. I didn’t find out about its existence and had not seen any pictures of it as I deliberate the journey. After I witnessed the view from the overlook, I used to be fully overwhelmed by the enormity and fantastic thing about the scene. I keep in mind I had an analogous feeling after I visited the Grand Canyon for the primary time.
Sadly, the picture doesn’t convey the dimensions of the scene or its vastness.
Taking pictures
After I was able to {photograph} the Desert Outlook, I noticed that I confronted two challenges.
First, the scene was too huge to seize it in a single shot even when I used the widest focal size of 10mm. I solved the issue by capturing six vertical pictures at a focal size of 18mm with the objective of mixing the photographs right into a extensive panorama throughout enhancing.
The second problem was the cruel lighting. Though the afternoon solar was partly shielded by the clouds, the sky was nonetheless too contrasted for my style. However, since I used to be pressed for time and couldn’t afford to hike right down to the valley for a greater vantage level, I took a collection of panoramas and was quickly on my approach to the Cathedral Valley.
Enhancing & Processing
Again dwelling after I mixed 5 pictures right into a panorama, I noticed that I actually didn’t like how the white clouds appeared towards the blue sky. I wasted a very long time in Photoshop attempting to enhance it, however I nonetheless didn’t just like the outcomes.

To salvage the shot, I knew I needed to cheat. I wanted to interchange the sky.
Usually, I attempt to keep away from utilizing the sky substitute method. I don’t do that fairly often. I consider there is just one picture in my portfolio the place I used this method. However, on this case, I actually, actually, appreciated the situation and wished a good picture.
I chosen a collection of pictures I took two hours later in Cathedral Valley. I mixed them right into a panorama in Lightroom and changed the sky within the authentic picture in Photoshop utilizing the Transparency Masks.

Lightroom (50%)
I used the Panorama Picture Merge module of Lightroom to mix 5 authentic RAW pictures. Subsequent, I used one other set of RAW pictures to create the second panorama for the aim of sky substitute.
I used the Crop Overlay instrument to vary side ratio to a 16 x 9 ratio.
Lastly, I used the Napa preset from my model new product Journey Package Professional.
Then I used the TOOLKIT to spice up the Distinction.
The Lightroom Preset Enhancing Method: Napa (1, 9, 13, 40)
Photoshop (50%)
IIn Photoshop I changed the sky within the authentic shot by putting 2 panoramic pictures in 2 separate layers and I used the Transparency masks to mix them collectively.
The remaining was a easy increase of particulars and noise discount.
Plugins: DeNoise (noise discount), Topaz Element (native distinction increase).
Whole time: 35min