
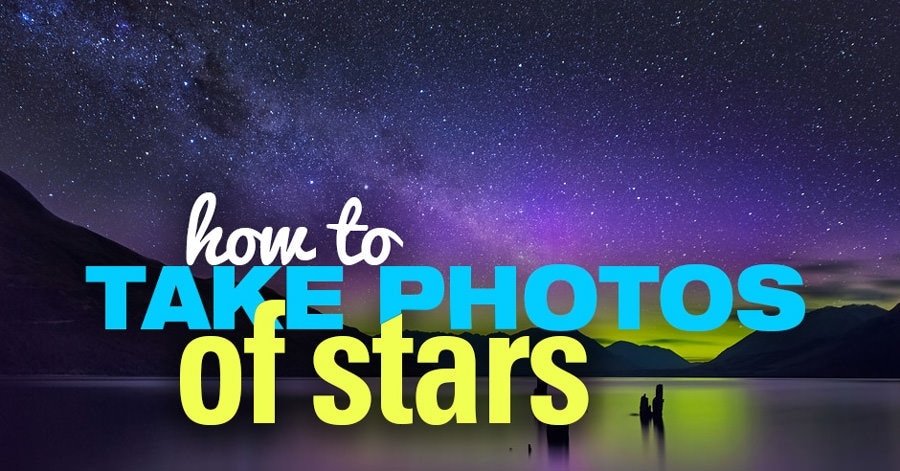
The Tips on how to Take Photos of Stars Information is the product of collaboration between Kevin Choi from CapturetheMoment.pics and Viktor Elizarov from PhotoTraces.com.
In some unspecified time in the future within the images journey, each photographer entertains the opportunity of moving into astrophotography. However, for a lot of newcomers, it’s a scary proposition due to two main misconceptions.
False impression One
The gear for astrophotography is prohibitively costly and, in consequence, is out of attain for many newcomers and hobbyists.
This was true even 5 to seven years in the past when a mix of cameras able to producing high quality photos at excessive ISO paired with a quick and vast angle lens would value you wherever from $4,000 to $5,000.
However, lately, issues have drastically modified. Speedy advances in sensor expertise enable us to make use of entry degree cameras from practically any producer to {photograph} the celebs. Additionally, third occasion lens producers, largely these from Asia, lastly achieved the proper steadiness between the standard of lenses and worth.
We are going to deal with the gear it’s worthwhile to {photograph} the celebs in nice element within the Tools part however, it’s price mentioning now that you would be able to have all of the gear crucial for astrophotography for underneath $1,000.
False impression Two
The second false impression is that the strategy of photographing the celebs is simply too complicated for many newcomers. That is fully false. The astrophotography course of is definitely quite simple and simple. However, what makes the method extra time consuming than conventional panorama images is preparation and scouting.

What’s Astrophotography in Easy Phrases?
Whenever you take a look at the sky at evening with a unadorned eye, you see solely the brightest stars and, even then, the brightest are nonetheless very dim.
Astrophotography permits us to amplify the brightness of the celebs by protecting the digicam’s shutter open for an extended time period, which lets the digicam sensor seize far more gentle than what’s potential with our eyes.
In consequence, astrophotography permits us to {photograph} stars that aren’t seen to the bare eye.
Tools
Although location is crucial a part of the astrophotography equation, there may be clearly no technique to {photograph} stars with out the right gear.
There are 5 items of apparatus you want, however solely three are important.
1. Digital camera
You want a digicam with handbook controls that may produce first rate, high quality images at ISO 1600-3200. The excellent news is that the majority trendy cameras already fall underneath this class.
2. Lens
The Milky Method is unfold extensively throughout the sky and is a really dim topic. Due to this, you want a large and quick lens.
If you wish to shoot the entire Milky Method in a single shoot, you will have a lens wider than 24mm on a full body digicam or 18mm on APS-C.
For the aperture, f4 is sweet, f2.8 is nice, any lens with aperture quicker than f2.8 is great.
3. Tripod
That is most likely crucial a part of the whole astrophotography setup. When utilizing a shutter velocity of round 20-30 sec, even the slightest motion of the digicam will wreck your images. Which means that it’s not sufficient to make use of simply any tripod, it’s important that it’s rock stable.
4. Headlamp
That is an non-compulsory piece of apparatus that may be changed with any normal flashlight.
5. Distant Shutter Launch
The distant shutter launch is one other non-compulsory piece of apparatus. It may be changed by the two sec delay performance on most cameras.
Kevin’s Tools
Each the Nikon D810 and Canon 100D can produce nice high quality photos even underneath ISO3200 however, in fact, the Nikon D810 is healthier.
Viktor’s Tools
I’ve a minimalistic astrophotography setup.
I take advantage of a Sony a6000 digicam and a Rokinon 12mm f2.0 prime lens. I take advantage of a Feisol tripod which, by design, doesn’t have a middle column and is extremely regular even in windy situations.
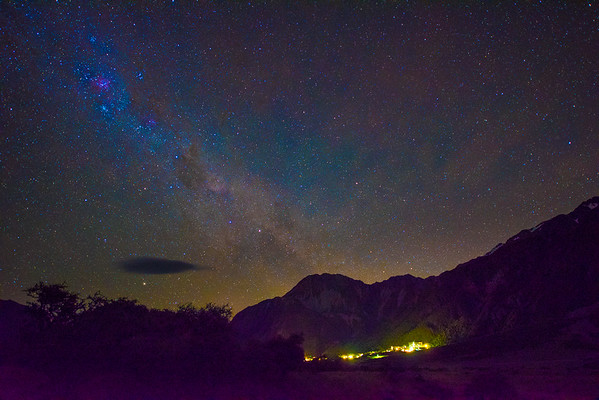
Discovering the Milky Method and the Darkish Sky
Whenever you begin studying the best way to {photograph} the celebs, the Milky Method is normally the primary and hottest object to shoot.
Nonetheless, it may be a problem to search out the Milky Method at midnight sky. Although all of us stay within the Milky Method galaxy, most individuals by no means see it.
Earlier than going into the technical facets of taking pictures the Milky Method, it will be significant that you simply first know the best way to discover it.

Seasons of the Milky Method
Though the Milky Method is at all times throughout Planet Earth, you see completely different elements of it relying on the completely different seasons and your location.
The perfect months to shoot the Milky Method are at all times from March to September. Throughout this time, you’ll be able to {photograph} the Milky Method’s vivid galactic heart.
It’s also possible to shoot the Milky Method all through the remainder of the 12 months as a result of, even with out the galactic heart, you possibly can nonetheless create fascinating images.
Darkish Sky
One other issue that instantly impacts astrophotography is the darkish sky. The Milky Method is dim by itself so even the tiniest trace of sunshine could make it much less seen and more difficult to {photograph}.
Mild air pollution and moonlight are the 2 fundamental gentle sources that have an effect on astrophotography probably the most.
Mild Air pollution
The place there are individuals, there may be gentle. At evening, that is referred to as gentle air pollution. Due to gentle air pollution, it’s nearly unimaginable to {photograph} the celebs in the midst of the town.
One of the best ways to find areas with minimal gentle air pollution is to verify this free on-line useful resource often called the Mild Air pollution Map. Yow will discover it right here: http://www.lightpollutionmap.information/
Moon Section
One other supply of sunshine that impacts the darkish sky and photographing the celebs is the moon. When there’s a full moon, it’s nearly unimaginable to seize any stars.
The perfect apply is to shoot throughout a brand new moon or to shoot earlier than the moon rises or after it units. By timing the moon good, you possibly can be certain that your digicam is ready to seize the best particulars of the Milky Method.
To verify the moon section, you possibly can go to these web sites:
Kevin’s Scouting Routine
I usually verify the moon section and climate report first. If the day is sweet for taking pictures Milky Method, I’ll then verify StarWalk 2 to see what time I ought to exit. Then, I’ll head to some panorama images group on Fb and in addition 500px to search out some new location. If I discover an fascinating panorama location, largely dawn and sundown spot, I’ll then verify Google map to see if the place faces the Milky Method or not.
I wish to go to places that no individuals have shot Milky Method earlier than to provide myself a problem. If the climate turns all of a sudden cloudy, I nonetheless have an opportunity to shoot an incredible dawn or sundown.
Viktor’s Scouting Routine
My scouting routine begins with the usual set of instruments I take advantage of for my journey images planning. I take advantage of Google Maps, Google Earth, and 500px.com to search out fascinating places. I praise them with an android model of Star Stroll 2 when scouting particularly for astrophotography.
Focusing
The primary problem of capturing the proper picture of the celebs is to get the celebs as sharp as potential. Focusing turns into probably the most important a part of the method. However, everyone knows how troublesome it’s to focus in full darkness.
It sounds easy—you at all times focus to infinity. In principle, all you must do is flip the focusing ring all the way in which to the appropriate. In actuality, nevertheless, this may focus past infinity on most lenses, which is completely illogical from a physics perspective. Focusing past infinity will produce out-of-focus and tender stars.
Listed here are a number of completely different methods you should use to get the celebs in focus and sharp:
- Whereas scouting throughout the day, focus after which make marks in your lens as reminders.
- Know precisely the place infinity is on each lens you personal. Discovering infinity may be extra problematic on a zoom lens since, for various focal lengths, infinity will probably be elsewhere.
- Take a number of check pictures and verify the sharpness of the celebs after each shot. Preserve adjusting the main focus till you could have the proper settings.
Viktor’s Focusing Routine
I’ve a really simplified focusing routine. I’ve just one lens devoted to astrophotography – a handbook prime lens. I do know precisely the place infinity is on the lens however, to make sure the proper shot every time, I made a small mark on the lens as a reminder.
Kevin’s Focusing Routine
I take advantage of a special focusing method with my 14-24mm zoom lens. I swap the digicam to a stay view, zoom in to a most, discover a vivid star, and deal with it.
Capturing Method
As I discussed earlier, taking pictures is without doubt one of the best elements of the whole astrophotography course of. Why? Since you shouldn’t have a lot room or flexibility to experiment with a wide range of completely different settings.
Let me clarify.
The sky is darkish and the celebs are dim. You employ the widest aperture potential to seize that restricted gentle.
The earth is continually shifting, which limits your selection of shutter velocity values. Should you transcend a 25-30 sec shutter velocity, the impact of star trails turns into apparent which, in flip, makes the celebs tender. I personally want to by no means transcend a 25 sec publicity.
This leaves us with the one parameter we are able to mess around with – the ISO.

When I’m on location, I’ve my digicam in M (handbook) mode. I set the aperture to f2.0 (the widest worth on my lens), the shutter velocity to 25 sec, and the ISO to 640. Then, I take a check shot. I preview the picture and analyze the histogram. Usually, these settings produce an underexposed picture so I begin growing the ISO and analyzing the preview after every shot till I’ve a correctly uncovered picture. From that second on, I maintain taking pictures with the identical settings for the remainder of the evening.
Associated: Low Mild Pictures Suggestions
The shutter velocity of 25 seconds just isn’t a great worth. To get sharper stars, I want to shoot between 15 and 20 seconds, however I additionally need to steadiness this with the ISO worth by not going past ISO3200. I discover that even ISO3200 is a bit an excessive amount of for the Sony a6000 APS-C sensor.
Maybe crucial facet of taking pictures is that you simply at all times shoot in RAW.
Composition in Astrophotography
Even when you’ve got all of your gear prepared, you recognize precisely the place to search out the Milky Method and you recognize precisely what settings to make use of to {photograph} the evening sky, this doesn’t routinely assure that it is possible for you to to provide fascinating images. Astrophotography is not any completely different than some other sort of images as it’s not sufficient to have all of the technical facets in place. The creative half at all times comes into play.
Should you merely {photograph} the sky, your images will seem like sky charts and, whereas they could be technically sound, they’ll possible be boring. You should discover a technique to convey different parts moreover the sky into your composition. The weather of a scene can function reference factors for the viewer to emphasise the size of the sky.
When you’re taking pictures at evening in pitch black, it’s typically troublesome to visualise your potential compositions; typically, it’s not even potential to see the objects of the scene.
I like to recommend addressing the composition facet of your astrophotography shoot throughout the day if you find yourself scouting the scene. You may take your time with out dashing to evaluate the composition. Whenever you return to the placement at evening, composition turns into a easy technicality – a easy technique of triggering the shutter.

Modifying in Astrophotography
The enhancing a part of astrophotography isn’t any extra sophisticated than typical panorama enhancing. The one exception is that you simply at all times need to cope with extreme noise.
Right here is a straightforward define of enhancing in astrophotography:
Balancing Publicity
Earlier than you begin making use of any results, you first have to steadiness and regulate the publicity. Whenever you take photos of the sky, they normally come out a bit underexposed. Subsequently, you need to enhance the publicity of the picture till you attain a correctly uncovered starry sky with the Milky Method.


White Stability
The subsequent step is to regulate the white steadiness. Whenever you take image of stars in AWB (auto white steadiness) mode, the digicam usually produces a really heat toned picture.
Since images of the evening sky are naturally very darkish, it’s troublesome to determinate if the white steadiness is right or not. However, you possibly can at all times use a way often called the “Excessive Saturation Technique” to regulate the white steadiness.
Excessive Saturation Technique
First, enhance the vibrarance and saturation all the way in which as much as 100. Your picture will turn into oversaturated and have some arduous shade transition.
Don’t fear, you possibly can change it again later.

Subsequent, regulate the white steadiness by taking part in with each the temperature and tint sliders as a way to obtain a great steadiness of shade transition. It is best to have some yellow within the heart of the Milky Method and blue within the sky.
Lastly, change the vibrance and the saturation again to zero. With the proper white steadiness, your picture now appears extra pure.
The remaining is your typical enhancing changes. Enhance the distinction and readability, enhance the saturation and vibrance till you could have a picture with a vibrant sky and superbly contrasted stars.

Noise Discount
Capturing the evening sky at a excessive ISO (1600-3200) usually leads to a picture with extreme noise. By growing the distinction and saturation throughout the enhancing course of, you find yourself amplifying the digital noise much more.
Begin lowering the noise through the use of the Particulars panel in Lightroom. Should you discover it’s not potential to realize the specified outcomes, you probably want to make use of a devoted noise discount program.
Kevin’s Favourite Noise Discount Program
Noise discount is a vital a part of astrophotography.
The quantity of noise discount is completely different within the starry sky and the foreground. I take advantage of Nik Outline to get the job carried out. It permits me to create a layer masks to provide a special diploma of noise discount in a special space.
Viktor’s Favourite Noise Discount Program
I take advantage of Topaz DeNoise from Topaz Labs every day. I run noise discount with DeNoise on each single picture I edit. It turns into vital when enhancing astro photos.