
We’ve all seen it earlier than. Beginner campers fumbling across the campsite, attempting to get their tent arrange and failing miserably. It’s painful to observe, and a variety of the time somebody will probably be sort sufficient to step in and assist them out.
The factor is, establishing a tent can look like an advanced course of if you happen to’ve by no means finished it earlier than. In actuality although, it’s truly fairly a easy job. All you must do for issues to run easily is take the time to be taught the way it’s finished earlier than you get to your vacation spot.
This step-by-step information will train you every little thing it is advisable learn about pitching a tent. By understanding why every step is necessary, the method will robotically develop into extra intuitive. Outfitted with these easy directions, you’ll be capable of get your tent arrange very quickly in any respect.
So, are you prepared? Let’s go!
Pre-Journey Preparation

Earlier than we get began, there are a few belongings you’ll want to arrange earlier than you get to the campground.
In the event you’re the beginner camper from the intro and also you’re already on the campsite attempting to determine how you can get your tent up, skip to the subsequent part. In any other case, I strongly recommend you are taking the time to get acquainted along with your tent within the consolation of your house atmosphere.
Take all of the poles and stakes and guylines out and get a really feel for the way they work. It’s a good suggestion to have a go at pitching the tent at house, to familiarize your self with the method earlier than you get to your campsite.
In the event you anticipate windy climate in your tenting journey, you may wish to take into account shopping for some good-quality stakes and guylines. These that include your tent aren’t all the time the very best quality. So, it’s a good suggestion to equip your self with some higher stakes and guylines when tenting in tough climate.
Even when you’ve got a good suggestion of the sort of terrain you possibly can count on at your vacation spot, you by no means understand how robust the bottom goes to be on the tenting spot you choose. Because of this, it’s an awesome thought to get your self a mallet if you happen to haven’t already bought one. This may make staking your tent a lot simpler if the bottom beneath is harder.
Campsite Choice
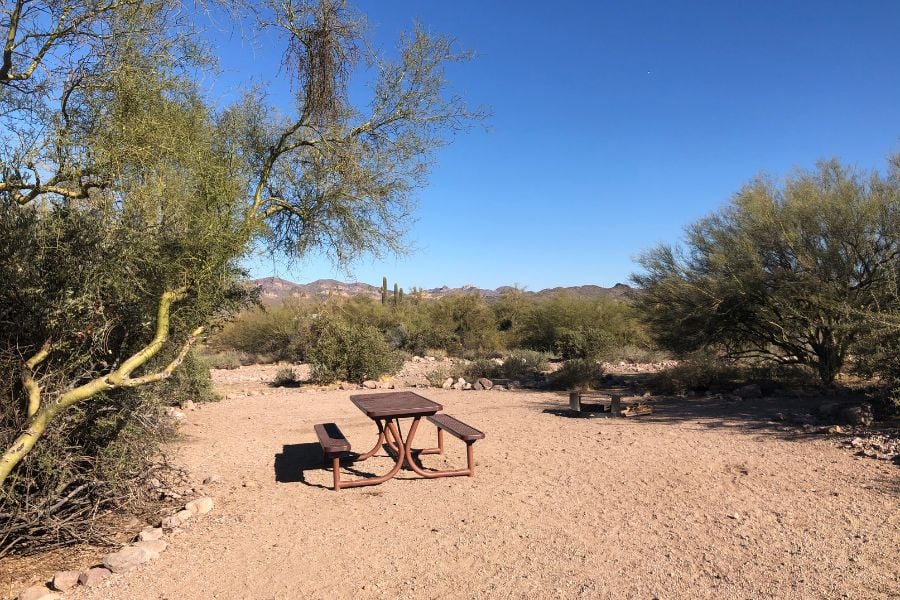
Once you arrive at your vacation spot, the very first thing you’re going to should do is locate the best spot to arrange your tent.
You’ll wish to search for a pleasant, flat floor, however that’s not all. There are a number of different components you need to take into account when selecting a campsite.
To start with, it’s a good suggestion to go for a campsite on greater floor. It is because you’ll be much less prone to expertise hassle with condensation, which tends to happen in locations at decrease altitudes.
Think about how properly you’ll be shielded from the weather. In the event you’re tenting in windy situations, attempt to discover a pure windbreak.
If it’s summertime, be sure to choose a spot with as a lot shade as potential. Pure shade from bushes won’t solely shield you from the solar, but additionally decrease condensation.
Be careful for bushes which are broken or unhealthy, although. The very last thing you need is a tree department falling down onto your tent when you’re asleep.
One other factor to watch out of is how distant your tent is from the campfire. Be certain it isn’t too shut, or a gust of wind may find yourself blowing embers straight onto it. If this occurs, greatest case state of affairs is your tent will get broken, worst case state of affairs is it goes up in flames.
Consider it or not, the orientation of your tent can also be necessary. So, pay attention up, as a result of this half may truly make all of the distinction.
In the event you’re tenting in scorching climate situations, be sure to have the door of the tent going through the wind. This may permit the wind to blow instantly into your tent, retaining you good and funky.
In the event you’re tenting in windy climate situations, be sure that the tent’s strongest poles are going through the wind. This may offer you the absolute best stability.
Remember to adhere to Go away No Hint rules, with a view to decrease interference along with your environment. These rules embody the next:
- Searching for out present campsites when tenting in well-traveled areas
- Organising camp a minimum of 200 ft from lakes and streams
- Conserving campsites small and sticking to areas the place vegetation is absent
- Dispersing to stop the creation of latest campsites and avoiding locations the place impacts are simply starting
Additionally See: The ULTIMATE Information to Campsites, Campgrounds & Tenting Facilities
Tent Setup: A Step-By-Step Information
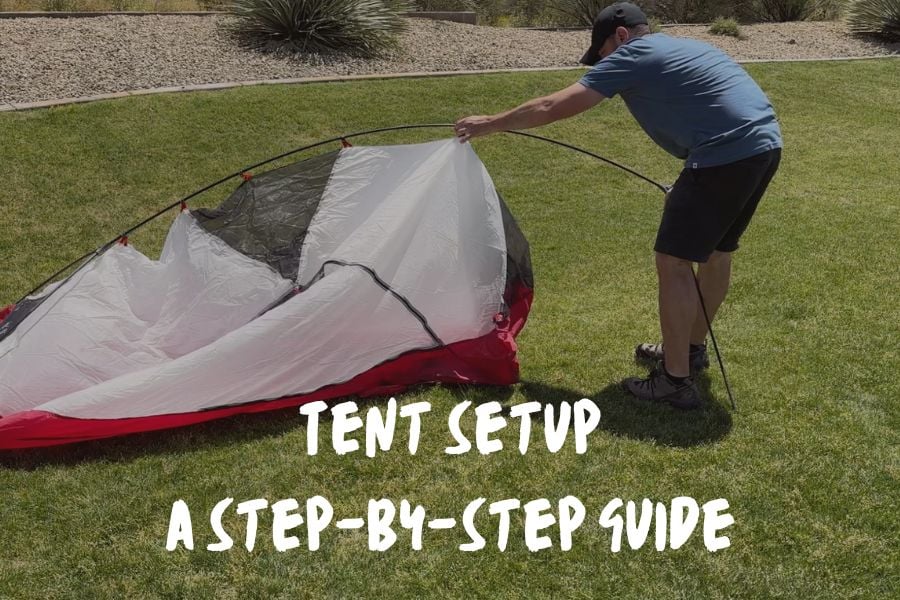
When you’ve discovered a pleasant, flat spot, you’re prepared to start establishing your tent. Right here’s the way you’re going to do it.
Step 1: Take away any rocks or sticks from the realm
The very first thing you’ll wish to do is be sure to eliminate any pointy rocks or massive sticks which are within the space that’ll be beneath your tent.
That is so that you simply don’t find yourself with something poking you if you roll over in your sleep. Plus, it’ll shield your footprint and tent from getting broken.
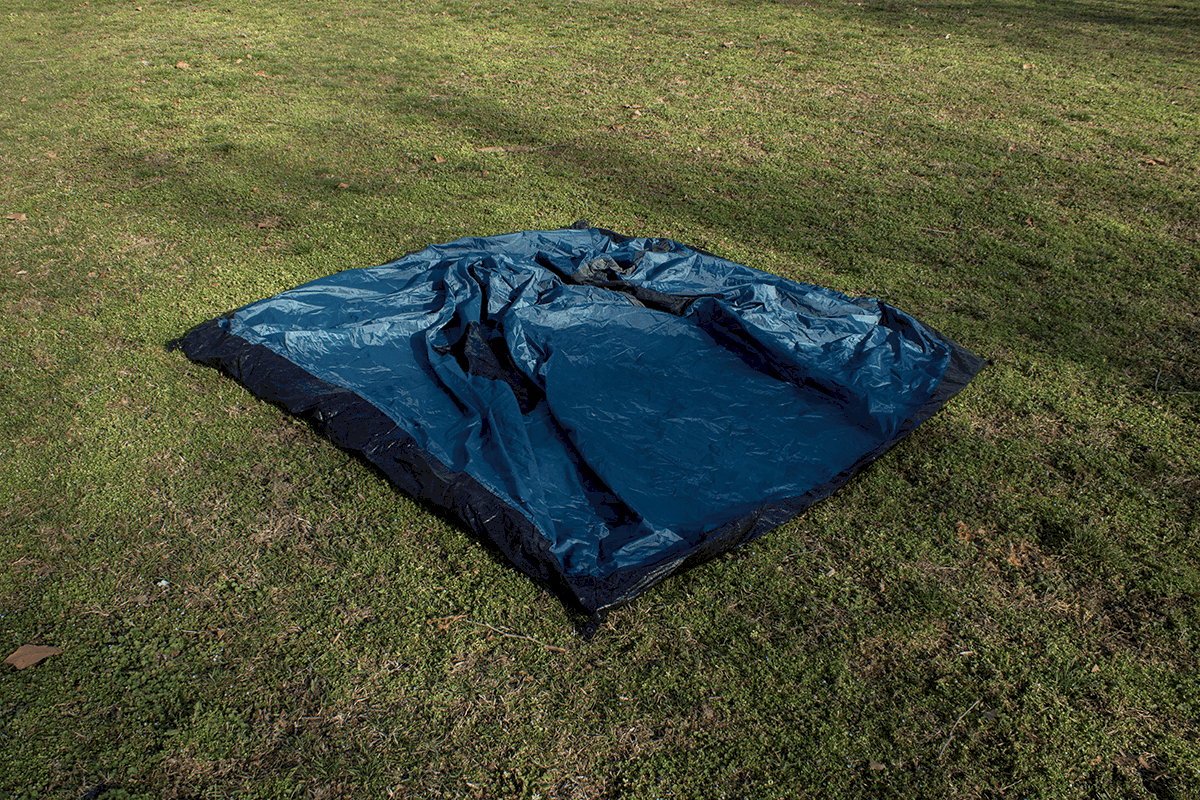
Step 2: Lay down your footprint or tarp
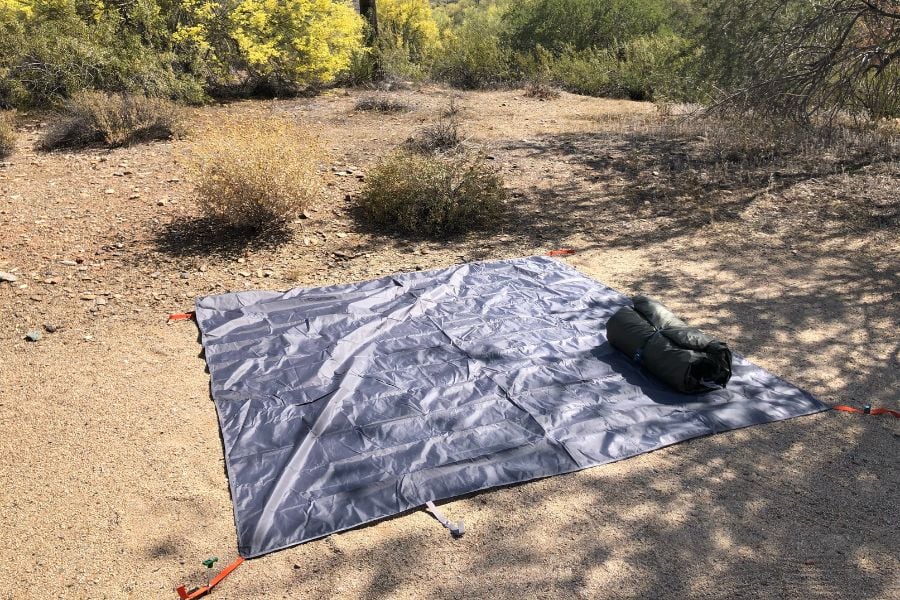
When you’ve cleared the realm, you possibly can lay down your footprint or tarp. Lay it out flat the place you’re going to place your tent up.
In the event you’re utilizing a tarp that’s bigger than the bottom of your tent, be sure that to fold the perimeters in to stop water from amassing and moving into your tent.
Observe: this step is non-obligatory, so if you happen to don’t have a tent footprint or tarp you possibly can skip straight forward to step 3. Whereas it isn’t completely crucial, utilizing a footprint or tarp will shield your tent from put on and tear, finally making it last more. So, it’s a good suggestion to think about using one.
Step 3: Lay the tent out flat
Subsequent, lay your tent out flat within the place it’s going to be in. Be certain it’s going through within the route you need it going through.
That is additionally a very good time to verify the perimeters of your tarp (if you happen to’re utilizing one) are tucked in in order that they’re in keeping with the bottom of the tent.
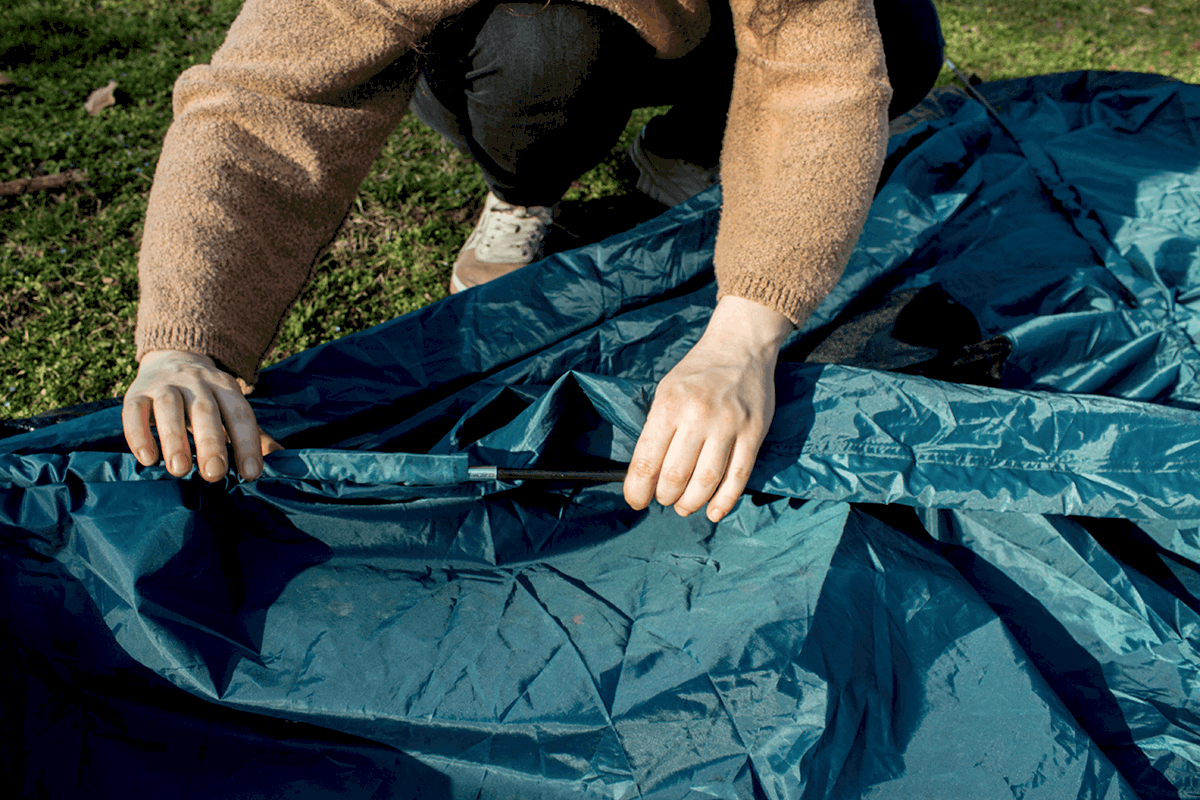
Step 4: Join the poles
Once you’ve bought your tent laid out flat in entrance of you, it’s time to take your poles out and put them collectively.
It doesn’t matter when you’ve got aluminum or fiberglass, this step the identical.
Slide the items collectively to attach them, and lay the linked poles throughout the tent the place they’re going to be connected.
A basic dome tent will normally have 2 poles in an X form with the ends of the poles on the corners of the tent.
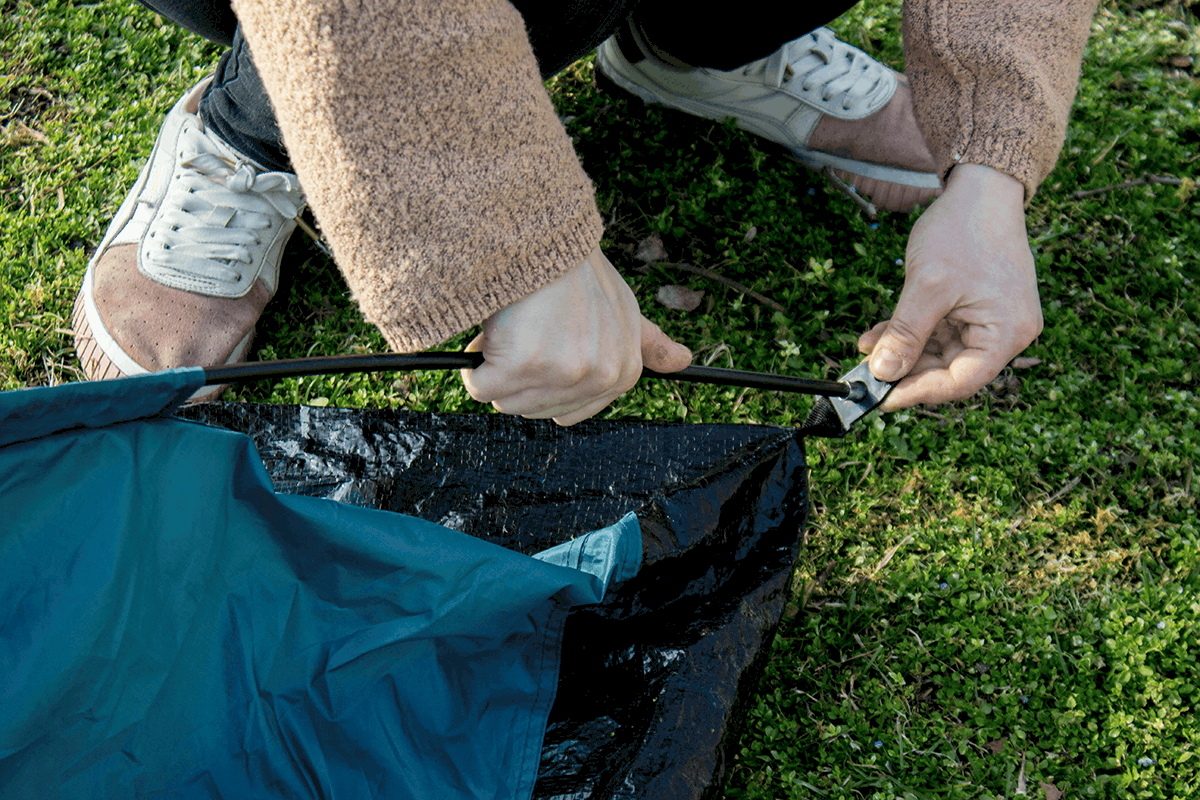
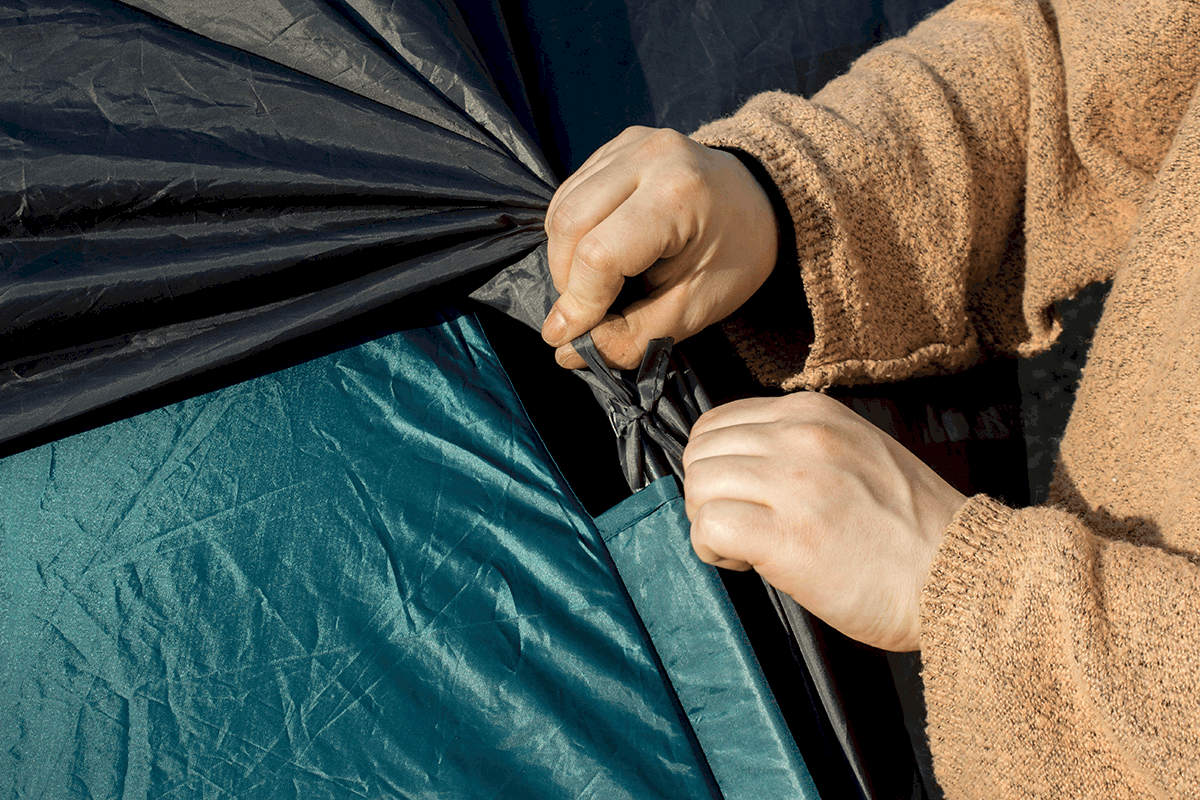
Step 5: Connect the poles to the tent
The following factor you wish to do is connect your poles to your tent.
Relying on the actual mannequin of tent, you’ll have both pole sleeves, loops, hooks or one thing alongside these strains. Thread your poles by way of these one after the other.
Don’t get pissed off if the poles detach when you’re threading them by way of. It’s best to be capable of reattach them with out having to start out over. Simply take this half good and sluggish, and attempt to be as mild as you possibly can.
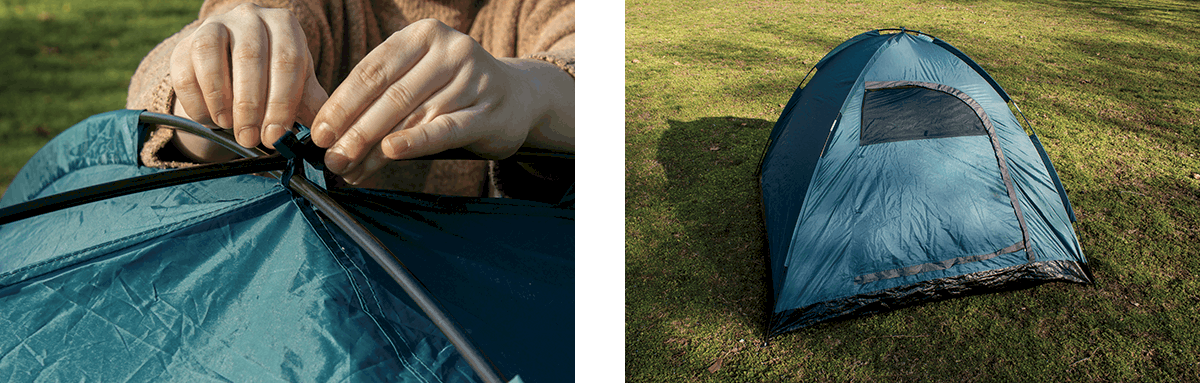
Step 6: Increase the tent
Now, that is the second of reality. When you’ve connected your poles to your tent, safe the ends of every pole to the holes on the corners of the tent’s base. This may raise the tent and produce it up right into a dome formed construction.
This half is usually a bit tough, as a result of every little thing must line up to ensure that the tent to come back collectively.
In the event you’ve bought somebody to offer you a hand, you possibly can maintain down one nook whereas the opposite particular person secures the opposite finish. This makes issues simpler, as a result of the poles can come out of the holes if you’re doing it by your self.
In the event you’re solo tenting although, don’t fear, you possibly can nonetheless get this step finished with none assist. It would take a minute or two longer, however it’s nonetheless completely doable.
When you’ve raised the tent, tie it to the purpose the place the poles meet on the prime.
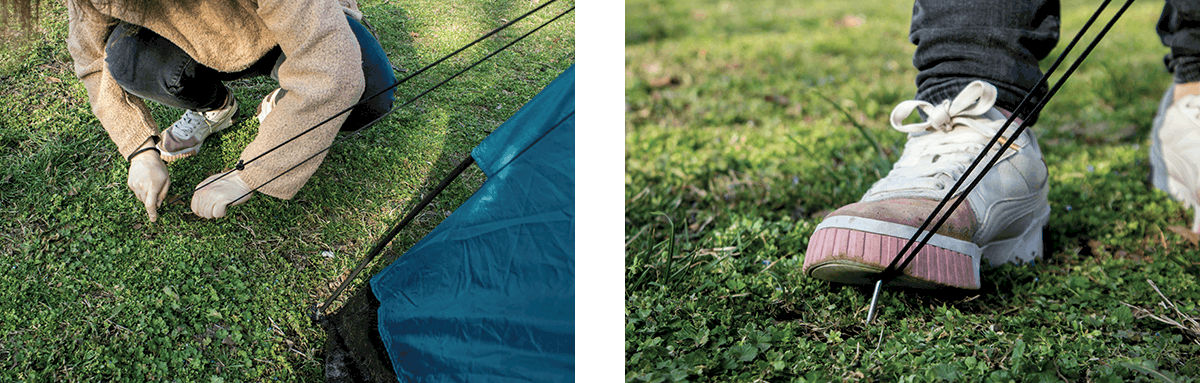
Step 7: Staking your tent
When you’ve bought your tent up and also you’re proud of the way it’s wanting, there’s yet another factor you’ve got left to handle: securing your tent to the bottom.
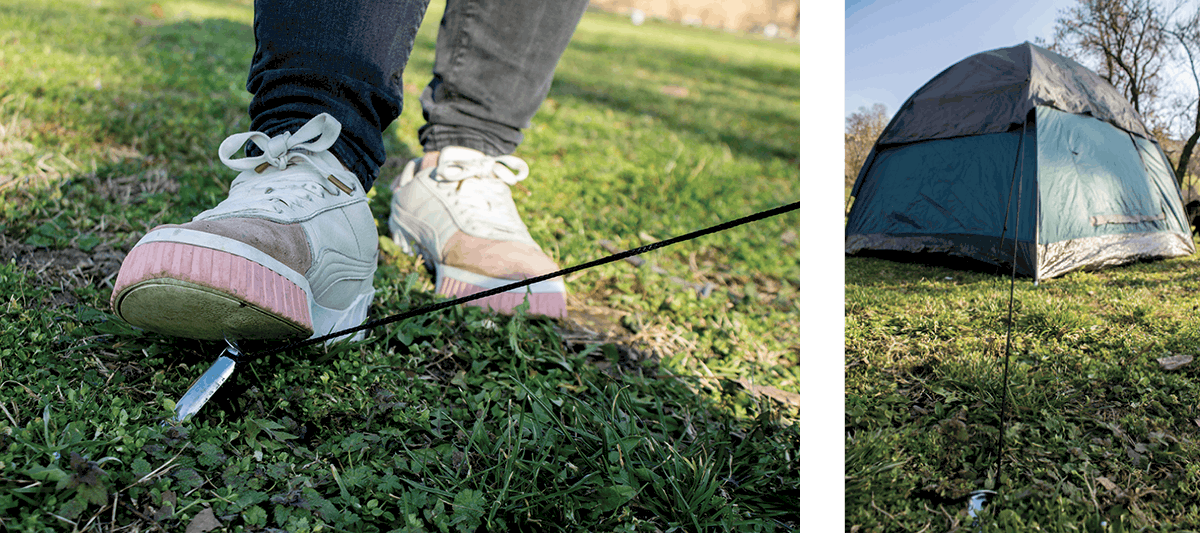
That is finished in 2 steps, the primary of which is staking the tent down. Push every stake all the best way down into the bottom, by way of the holes on the corners of the tent. Every stake needs to be inserted at round a forty five diploma angle.
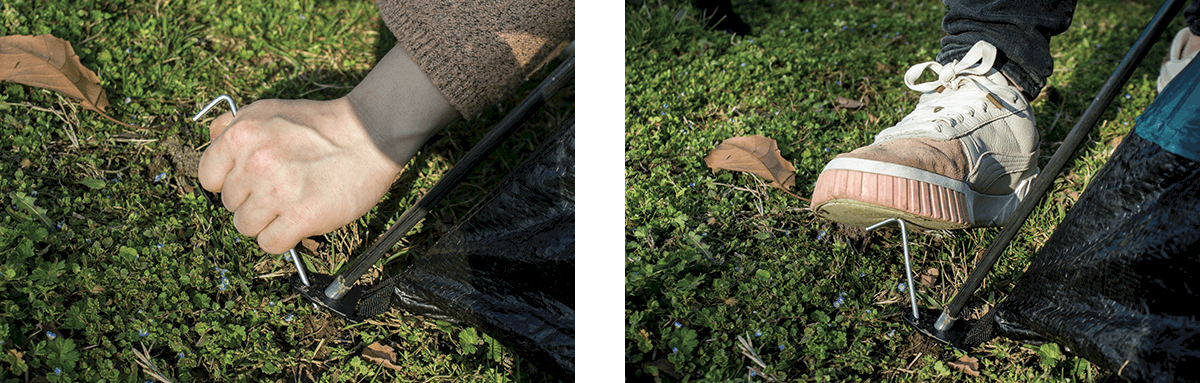
In the event you remembered to convey a mallet, this half goes to be a lot simpler. In the event you haven’t bought a mallet, attempt pushing down on the stakes with the heel of your foot, to drive it as far into the bottom as you possibly can.
Step 8: Connect the rain fly
Earlier than you possibly can proceed to the second and last section of securing your tent with guylines, you’ll wish to handle waterproofing your tent. That is greatest finished with the usage of a rain fly.
Unfold the rain fly and place it over your tent, ensuring the door on the rain fly aligns with the tent’s door. Safe the rain fly to the poles on the tent utilizing the accessible loops, hooks or tabs.
Lastly, pull the loops on the underside of the rain fly down as distant from the bottom of the tent as you possibly can. Safe them to the bottom utilizing stakes, as you probably did within the earlier step.
Observe: this step is non-obligatory. In the event you’re tenting in advantageous climate, you will get away with not placing up a rain fly.
As everyone knows although, the climate might be unpredictable, particularly within the mountains. So, if you wish to be sure that the contents of your tent keep dry, overlaying your tent with a rain fly offers you peace of thoughts.
Step 9: Guying out your tent
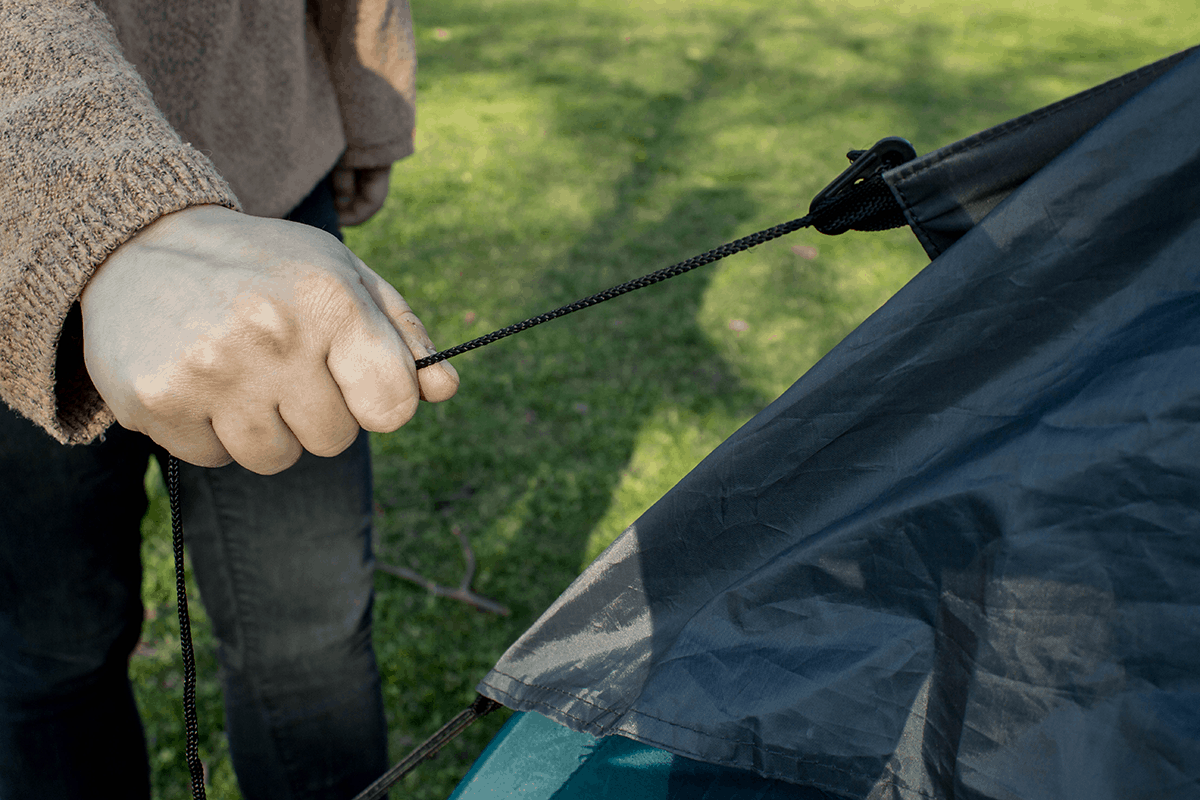
The second step in securing your tent is guying it out.
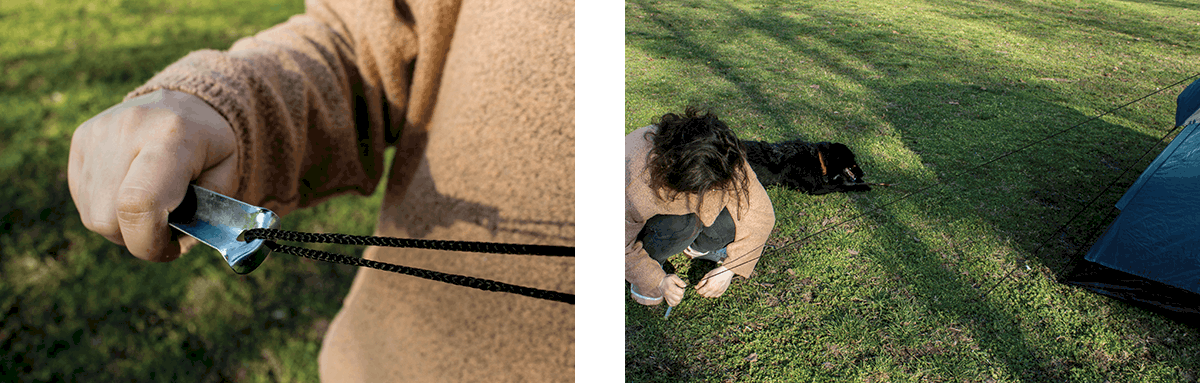
Connect your guylines to the guyout factors in your tent, and pull them out tightly earlier than tying them to surrounding bushes, rocks, logs or the bottom.
In the event you’re securing them to the bottom, tie the ends of your guylines to stakes utilizing a bowline knot or a trucker’s hitch. Then, push the stakes into the bottom in the identical approach you probably did in step 7.
Pull the guylines out tight earlier than tying them down to verify there isn’t any slack. As soon as secured, they need to bounce again if you pull down on them along with your finger, sort of just like the strings on a guitar.
Observe: this step is non-obligatory. In the event you don’t encounter any robust winds, your tent ought to be capable of keep up simply advantageous with out guylines. Loads of the time, staking the tent down will probably be sufficient to maintain it in place.
Apart from added stability, guying out your tent can even assist separate the rain fly from the remainder of the tent, enhancing air flow. Because of this, guying your tent out is an effective transfer even if you happen to aren’t anticipating windy climate.
Setting Up Different Kinds of Tents
Up up to now, this information has centered on a basic dome tent setup. After all, there are numerous different kinds of tents and a few of them require a special sort of setup.
These are another kinds of tents and the way they differ:
Teepee tent
- With a teepee tent, you stake it out earlier than you elevate it.
- You elevate the tent by inserting the middle tent pole, then you definitely tighten the corners once more.
- On the finish, you add the interior tent and groundsheet
Backpacking tent
- These may look fairly totally different to a basic dome tent, however the setup process is definitely just about precisely the identical.
A-frame tent
- Like a teepee tent, you stake this type of tent out earlier than elevating it.
- It’s additionally raised identical to a teepee tent, apart from the truth that there are 2 poles (1 on both finish) relatively than 1 within the center.
- On the finish, you connect the guylines and rain fly.
Freestanding tent
- With freestanding tents, you join the poles and arrange the tent body first.
- Subsequent, you connect the interior tent to the body.
- Lastly, you connect the tent fly.
- No staking or guylines are wanted with a freestanding tent. This makes them simple to arrange on a platform, the place you’d have issue establishing a daily tent.
Pop-up tent
FAQ
How lengthy does it take to arrange a tent?
Tents can take wherever from 60 seconds to half-hour to arrange relying on the dimensions and sort of the tent, and the quantity of individuals establishing the tent.
The smaller the tent, the faster it’s to arrange since there will probably be much less cloth and poles.
Fast pitch tents like instantaneous tents and pop-up tents, are each made to arrange in only a few minutes, and the longest a part of your setup will probably be tying down guylines.
On common, a regular tent will take between 10 and 20 minutes to arrange.
What’s the quickest tent to arrange?
The quickest tent sort to arrange are pop-up tents. With built-in pole techniques, they may actually spring open. You possibly can have this tent setup in only a few seconds.
Nonetheless, instantaneous tents aren’t far behind. They arrive with a built-in hub pole system that may rise as you pull the poles aside. Then you definitely lock them into place with the locking mechanism.
What’s the hardest tent to arrange?
Canvas tents are going to be a few of the hardest tents to arrange.
They’re much heavier than commonplace tents and generally require a bit extra observe to get down.
Is it simpler to arrange a small or massive tent?
Smaller tents are by far and away simpler to arrange than bigger tents. They’ve fewer poles, and fewer cloth, making it an all-around shorter arrange.
After all this can differ by tent sort and mannequin, however on common a small tent will probably be quicker to place up than a big tent.
Abstract
That’s every little thing it is advisable learn about how you can arrange a tent. Over to you now. Get on the market, discover the right spot and have a go at establishing a tent for your self.
Go on, you are able to do it. Simply comply with the steps and you’ll’t go incorrect.
Good luck, and now you possibly can arrange the remainder of the campsite!